Vocal is a powerful tool for sending personalized voice messages via email. While it's incredibly easy to record and send a message to an individual recipient, what if you want to send a voice message to a larger audience, such as a newsletter subscriber list?
In this tutorial, we'll walk through the steps to send voice message "newsletters" using Vocal along with popular email marketing platforms like Mailchimp, Substack, or any other tool that allows you to send mass emails with merge fields.
Step 1: Record Your Voice Message
The first step is to record the voice message that you want to send to your newsletter audience.
1. Log in to the Vocal web app (you can also use the Gmail extension, but the web app is recommended for newsletter messages).
2. Click the record button and dictate your message. For example:
"Hey, thanks for reading my newsletter. Here's what's new with me this week..."
3. When finished, stop the recording.
4. Give your recording a descriptive name, like "Newsletter Voice Version", and save it.
Your voice message is now saved and ready to be shared.
Step 2: Get the Voice Message Link & Image
Next, you need to get the shareable link and image for your recorded message, which you'll insert into your newsletter template.
1. In the Vocal web app, find your saved recording.
2. Click "Copy Image." This copies both the image thumbnail of your recording and the link to listen to it.
3. You can also click "Copy Link" if you just want the URL without the image.
Now you have the voice message assets ready to add to your newsletter.
Step 3: Create Your Newsletter Template
The exact steps here will vary slightly depending on which email marketing tool you're using, but the general process is the same. We'll use some generic terms, but it should be easy to adapt to your specific platform.
1. Create a new email template or campaign in your chosen newsletter tool.
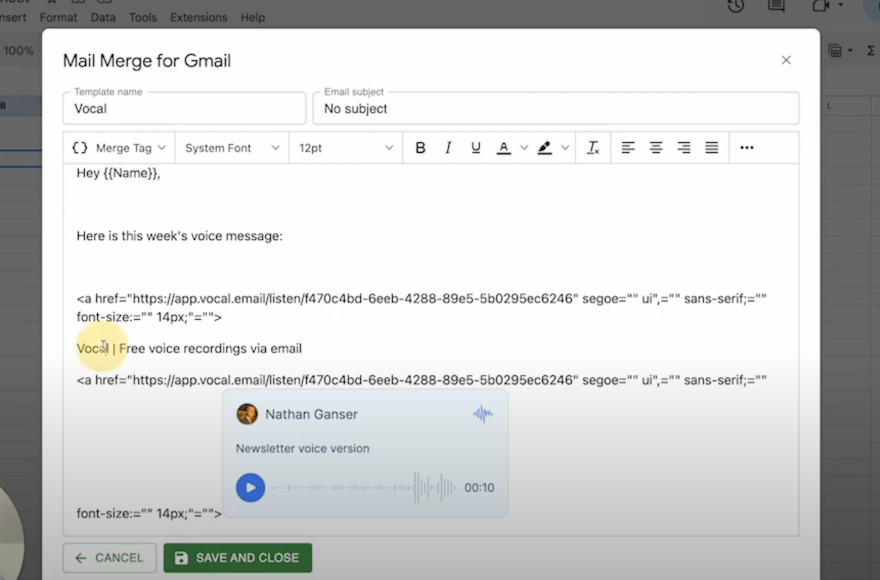
2. In the email body, add any desired text. You can use merge fields to personalize the message, like:
"Hey {{name}},"
3. Position your cursor where you want to insert the voice message, and paste the image you copied from Vocal.
4. The image should appear, but may not be clickable yet. Select the image and add a link to it, pasting in the Vocal message URL.
5. Add any additional text or elements to your email.
6. Save the template or draft.
Your newsletter template is now set up with an embedded voice message that recipients can click to listen to.
Step 4: Test and Send Your Voice Newsletter
Before sending your voice newsletter to your entire list, it's always a good idea to send a test to yourself first to make sure everything is working as expected.
1. In your email marketing platform, find the option to send a test email and enter your own email address.
2. Send the test and check your inbox.
3. Open the email and click on the voice message image. It should open the Vocal player in a new tab, and your recording should play.
4. If everything looks and sounds good, you're ready to send or schedule your newsletter to go out to your full subscriber list!
The process for sending will depend on your specific email tool, but it's usually as simple as choosing your subscriber list, selecting the template you created, and hitting send (or schedule).
Bonus: Tracking Analytics
One of the great features of Vocal is the ability to see analytics on your voice messages.
1. Back in the Vocal web app, find your newsletter recording.
2. Click "Analytics."
3. Here you'll see data on how many people listened to your message, on which days, and on what types of devices.
This can give you valuable insights into how your audience is engaging with your voice content.
Conclusion
Adding voice messages to your email newsletters is a great way to make a more personal connection with your subscribers. With Vocal, the process is straightforward:
1. Record your message in the Vocal web app
2. Grab the message link and image
3. Insert them into your newsletter template
4. Test and send your voice-enabled campaign
5. Track analytics on listens
While the exact steps may vary slightly depending on your email marketing platform, the basic workflow remains the same. With a little creativity, you can use Vocal to add a unique, engaging element to your newsletters.
Try it out for your next campaign and see how your audience responds to hearing your voice in their inbox!